*Digi Doodle Studios Feminine Fancy ends March 28th. My DT project
* The Paper Shelter Use metal My DT proj Ends 6th of March


Viser innlegg med etiketten tutorial. Vis alle innlegg

onsdag 15. februar 2017

Formkort med Scrappers Delight for Barnemix

Det er idag tid for min tutorial inne på siden hos Barnemix. Temaet denne måneden er alt annet enn firkantet kort. Jeg har valgt å lage en liten tutorial på formkort. Detaljene kan du finne her

Motivet denne gangen er fra Scrappers Delight. Her er resultatet:


og litt nærmere:


Detaljer:
hvit bazill
Mønsterark fra Studio Line
Blomster fra Wild Orchids Crafts
Blonder fra Live and Love Crafts
Diecuts: Go Kreate, Die Namics, Marianne design
doily fra Live and Love Crafts
vintage photo D.I
Perler fra stash

A toast to me amore er fargelagt med promarkers. Detaljer kommer senere idag. Ha en fin dag.

Cards Galore Encore: AG
Crafty Hazelnuts DP: Any DP goes
Creative Ladybird: AG
Eclectic Ellapu: AG
Stampin Royalty: Dies
The Paper Nest Dolls; AG
Open Minded Crafting Fun: Flowering in February
Crafty Creations: AG
A Bit more time to craft: AG
Scrapper's Delight: AG
Imagine That: AG
World Wide DT: AG

torsdag 13. februar 2014

A little inspiration at A Random Fan

It is finally time for my first inspiration post over at A Random Fan. I am a bit exited today, cause I did make a tutorial inspirated by a card I recently discovered at Split Coast Stampers. I made a building block card and you can see a mini tutorial of how I did mine over here.


My recipe:
turquoise, white and orange bazill
DP from My inds Eye and I Love Scrap
Ribbon from Lissi
Flowers from WOC
Diecuts: Cheery Lynn, Sizzix (letters) and Matianne design
Pearls from stash
vintage photo D.I

My lovely lady here is called little Miss Bashful and is coloured with these promarkers: tan, dusky pink, blush, baby pink, almond, chestnut, cocoa, cinnamon, warm grey 5, burnt orange, orange, amber, turquoise, duck egg, cool aqua, and cool grey 1.

4 Crafty Chicks: Use pearls
Milk N' Coffee: Girly
Handmade Harbor: Bright and happy
Inklings & yarns: Anything Goes
Make it Monday: Anything Goes

mandag 1. juli 2013

Corner bookmark tutorial for Inky Impressions

Today is my inspiration post for Inky and I am showing you a tutorial for a corner bookmark.


Ok first off you start with a bazill paper. Mine is 5" x 5". You can however choose to make a smaller or larger one. Only thing that matters is that the sides are the same length all around


Make sure you find the center of three of the pages like I did here and you score them like I have done with a bone folder and ruler. Think thatis the easiest way. 

Next thing that I do is punch the bottom edge and cut out the DP that I want to use,like this:


Then I use vintage photo distress ink and distress the edges and add the DP to the bookmark and that makes it close.


Then I decorate the corner bookmark. I've used cowgirl Lili and you can find her here. I've coloured her with my promarkers and added some pearls and a charm from the Inky Impressions store.


Hope you liked my little tutorial. Have a lovely day.

I'll deliver for these challenges:
Make it Monday: Anything Goes
Artistic Inspirations: Anything Goes
Crafty Boots: Anything but square
Created with love: For the girls
Cupcake Craft: Anything but square
Tammy's crapin' Corner: Summer fun
Crazy Challenge: Anything but a card
Whoopsi Daisy: Let's get girly
Card and Scrap:Bruk blonder eller bånd
2Sisters: Stripes (bottom DP)

tirsdag 28. august 2012

Happy happy birthday 2 years @ Top Tip Tuesday

It is tuesday again and finally time for another challenge over at Top Tip Tuesday. We are celebrating that this challenge blog has stayed on for two years now and I have to say for the time I have been aboard I've enjoyed this challenge sincerely!! Thanks for having me girls;)

I am actually hosting this challenge and have a tutorial going on for you @ the challenge blog. So you'll need to go have a peek at that one.

Happy Birthday to us

THEME

Birthday Gifts

ie - gifts, Wrapping/box/bag,
or use an image of a gift

Our sponsors for this challenge is:


Waiting on a New banner for the prize
Prize for one lucky winner

Stamp and Create is an on-line store based in the US. We ship worldwide with reasonable shipping prices.
We specialize in Rubber Stamps and Scrapbook supplies. Some of the companies we carry are: Wags 'n Whiskers Rubber Stamps, High Hopes Rubber Stamps, Whiff of Joy, The Greeting Farm, Kraftin' Kimmie Stamps, Stampavie, Whimsy Stamps, Emerald Faeries, Basic Grey, My Mind's Eye, Echo Park, Ribbon, Charms, embellishments, dies, and more!

Meljen's Store
4 images of winners choice.
Meljens Designs is a lovely stamp company owned and illustrated by Melissa Jenkins. She illustrates whimsical rubber and digital images inspired by her kids and family. Meljen's Designs has a new challenge every Thursday, and a Guest Designer each month at the Meljen's Designs Blog. Please visit the adorable line of Meljen's Designs stamps at our store HERE to browse all of Melissa's lovely designs! You can also see Melissa's exclusive rubber stamps at her corner of Whimsy Stamps, too!  Don't forget to join Meljen's Designs on Facebook HERE to take advantage of special sales and promotions that are just for her facebook fans!


My project this week is a tutorial on TTT blog site of a picnic box. You can find my tutorial at the challenge blog, and I am inspired by Randi's tutorial here


I've chosen to go with the sentiment on to a butterfly and then attached it to the side of the handle

Picture from the top 

Another picture from the side 


Closeup of the image attached to a diecut heart 
My recipe:
green bazill
DP from Maja design and Prima
Diecuts: Butterfly, heart
Roses from WOC and Storyteller
Pearl swirls from Prima
Doily from Kutt ut
Brads from stash
Shabby shutters D.I
Sentiment from Whimsy stamps
Magnets from Familieskatter

My image is from our sponsor Mejlens Designs and is called Birthday Cake Oopsy bear. I've coloured it with these promarkers: cocoa, cinnamon, tan, sandstonesunflower, dusky rose, baby pink, pale pink, denim blue, grey green, tea green and ice grey 1.

Now I hope I've inspired you to go have a play along with our birthday challenge!! Please visit our challenge blog to see what my very talented teamies have made for this challenge. 

I'll deliver for these challenges:
Craft your passion: Embossing (butterfly is dry embossed)
Make it Monday: Anything Goes
Eureka Stamps: Anything Goes
Forever Friends: Anything Goes
Totally Stampalicious: Anything Goes
The Crazy Challenge: Anything Goes
OSAAT; Use a digi
Robyn's Fetish: Anything but a card
A gem of challenge: Animals or teddies
Bunny Zoe's Crafts: Summer

tirsdag 31. januar 2012

Valentines @ Top Tip Tuesday

It's tuesday again and now it is finally time for another challenge here at Top Tip Tuesday. This time the theme as you probably have noticed is Valentines, so get in that romantic mood and create something special for a loved one. We can't wait to see what you create. I also have a fab tutorial in store for you, but first here's our sponsors: 

Bugaboo Stamps 
 Our lucky random winner will receive:
also sponsoring the challenge is the amazing

Robyn's Fetish

with this fab prize to the top tipper:
 
Robyn's Fetish Digital Stamps And More is proud to sponsor this challenge.Robyn's Fetish Digital Stamps And More, a division of I Did It Creations, was created and isowned by Robyn Weinrib. Robyn offers a wonderful variety of digital stamps and digital papers, designed to meet the needs of all digital paper crafting addicts for every occasion.
----------------------------------------------------


Tutorial - Mailbox
(after inspiration from Tine's mailbox found here)

Supplies needed:

1x 30x30cm sheet of cardstock/strong paper (maybe slightly larger)
1x 30x30cm sheet of double sided DP 
Ribbon to tie up the mailbox
Crop-a-dile
Border Punch
Strong Glue/Double Sided Tape
Optional: 2 sheets of 5x20 cm to decorate the sides, brads, lace, flowers etc.

Step 1:
Cut a piece of heavy cardstock with the measurements of 20x11 cm


Step 2:
Cut the mailbox floor that will go inside the mailbox: 20x11 cm 


and glue to the piece you've already cut out. 
Now score along both long sides at approximately 1.5cm and colour the edges.

Step3:
Attach double sided tapes on each side and cut a cardstock at 28x20 cm.
You can now choose to cut the dp that you want to use on the outside of the box. Same measurements as the cardstock.

Glue those 2 pieces together. Optional: you can colour the edges of the dp if you like.


Step 4& 5:
Now make the back and front of this box.
Make ready both the cardstock and the dp.
You can either choose to go easy and print ready measurements
found here and make it, or glue the sides of the cardstock on first and
draw around to get exact measurements. Remember you have to add
flips to the backside to attach to the inside of the mailbox.


Step 6
Glue the box together. For the backside take the long end first and attach the flips/tabs.
I've added the optional side decoration here.


Step 7
Make ready the handle to go outside. Use the precuts or draw your own and add dp's of preferance to the outside.

Attach to the mailbox either with a brad, for movement or glue it at the bottom tip and decorate!!


. I've had loads of fun making this mailbox it was quite easy to make to. Hope you'll try to make one at home;)
I'll add my recipe later on;)
Now I hope I've inspired you to take a look into our challenge blog to see what my very talented teammates have made for this challenge!

I'll deliver for these challenges:
Make it Monday: Anything Goes

Paper Pretties: Love
Stamps R Us: Valentines/Love
The Shabby Tea Room: Love is in the air
Victorine Stamps: Anything Goes
Come and Get it challenges: Anything but a card
Paper Sundaes: Valentines
The Crafty Pad: Show some Valentine/anniversary Love
Allsorts: One or more hearts
Hiding in my craftroom: Untraditional Valentines project
Lily Pad cards: Patterned papers challenge
The poodles parlour: Valentine/Love challenge
Crafty Ribbons Challenge: Love is red and black
Craft us crazy: Full of love
Delightful Challenges: Valentine's anything but a card
Simon Says Stamp: Anything Goes


tirsdag 18. oktober 2011

Top Tip Tutorial week

It's another tuesday and time for a new challenge here at Top Tip Tuesday.This week is also tutorial week, and this time around it's me having the tutorial. The challenge theme for this week is layer it up,so come on make those layers and join in on our challenge.

-----------------------------------

We have 2 neat sponsors yet again for this challenge:
Prize is $10 certificate

Here is the Inky Impressions Bio:"Inky Impressions is a rubber stamp company carrying images of the cutest little girls and animals. The inspiration of the stamps comes from the owner Nicole's little girl, MarLeigha (LiLi). Each Wednesday Inky Impressions has an Inky challenge hosted by their own Inkettes and if you participate each week, you are eligible to win a special goodie bag from the store at the end of the month. You can also catch some daily inspiration from all of the Inkettes on the Inky Impressions Inspirational Blog! Come play along with the fun and get inky..we dare ya!"

and


1 prize of a $10 voucher

'Stitchy Bear Stamps was created when a good friend of mine Sue from Beary Dust Stamps and I (Stitchy) were selling our products in the same store. One day we got an unexpected email saying that the store was shutting down and when we went to the store, poof it was gone...So, after the dust cleared and several emails later, Stitchy Bear Stamps was born. We gathered all the other creator's from the original store and away we went. It has been quite a learning experience but none the less we are growing everyday with new fabulous creators. I have always believed when God closes one door another Bigger and Better one opens ;)... Thank you all who have read our little story, I do hope you enjoyed ;) stitchy aka stitchy stamps."
------------------------------------------------------------
My pop up card tutorial

Supplies needed:
Paper cutter
4 1/4"x11" piece of card stock for base
21/2" x 5" piece of card stock for tag
2 3/4" x 5 1/4 " piece of card stock for tag matting
(If you're doing like me you're gonna need extra patterned paper for decorating)
Stamps
Inks
Double sided tape
Hobby blade
Ruler
Crop-a-dile
corner punch for the tag
Accessories
-------
Step-by-step:

Step 1
Score the 4 1/4"x11" piece of card stock at 1", 2 3/4", 3 3/4", 5 1/2", 7 1/4", 8 1/4" and 10"


Step 2
Turn the same cardstock around and find the middle and mark at 5/8" in from both sides and cut between the marked lines to make room for the tag


Step 3
Add the double sided tape to the front side at each end. One at the top of the last score and on the bottom side at the other score line at the very other end

Step 4
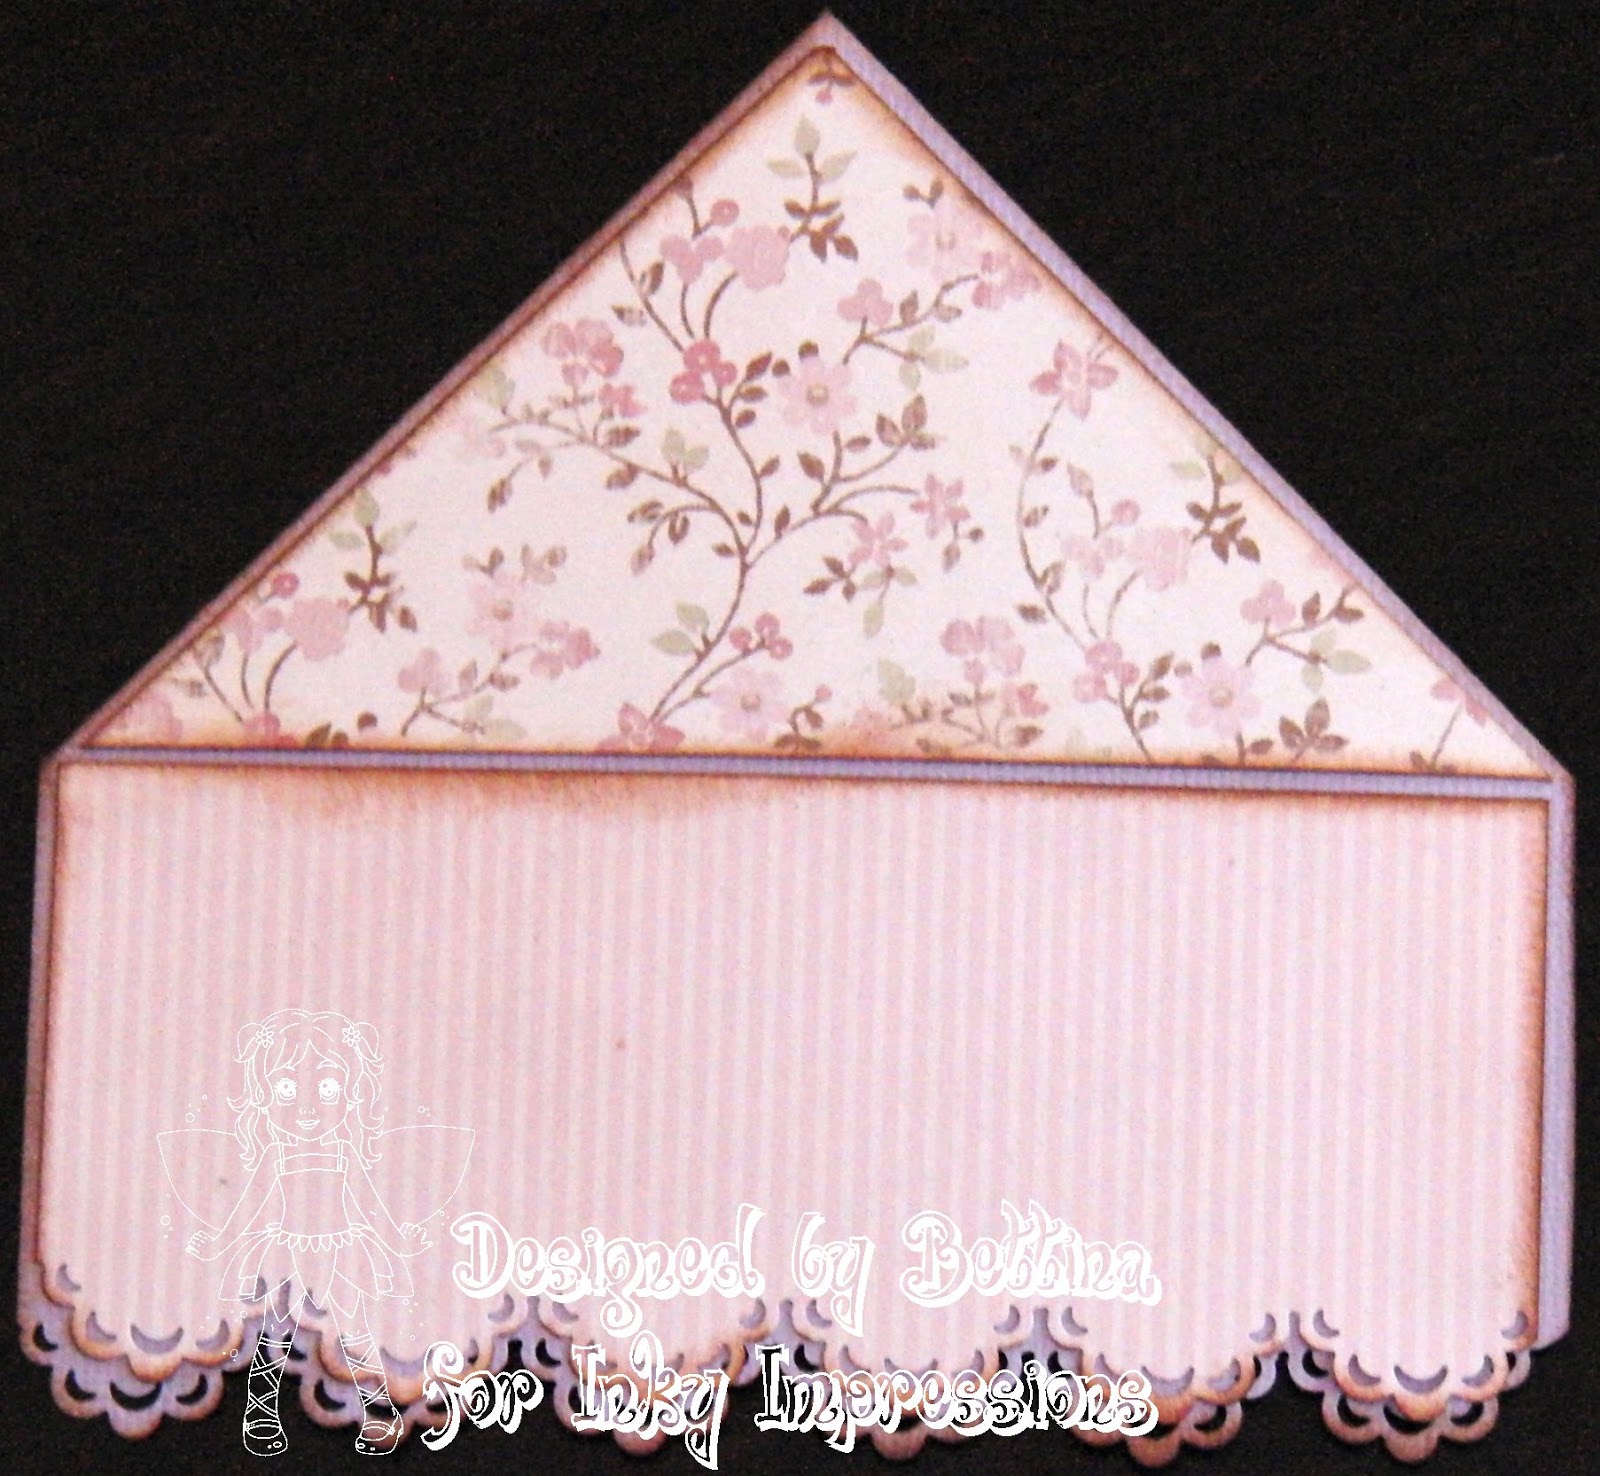
Make your own tag using the 2 1/2" x 5" piece of cardstock and adhere to the mat that is 2 3/4" x 5 1/4". Use the crop-o-dile and the corner punch.


Step 5

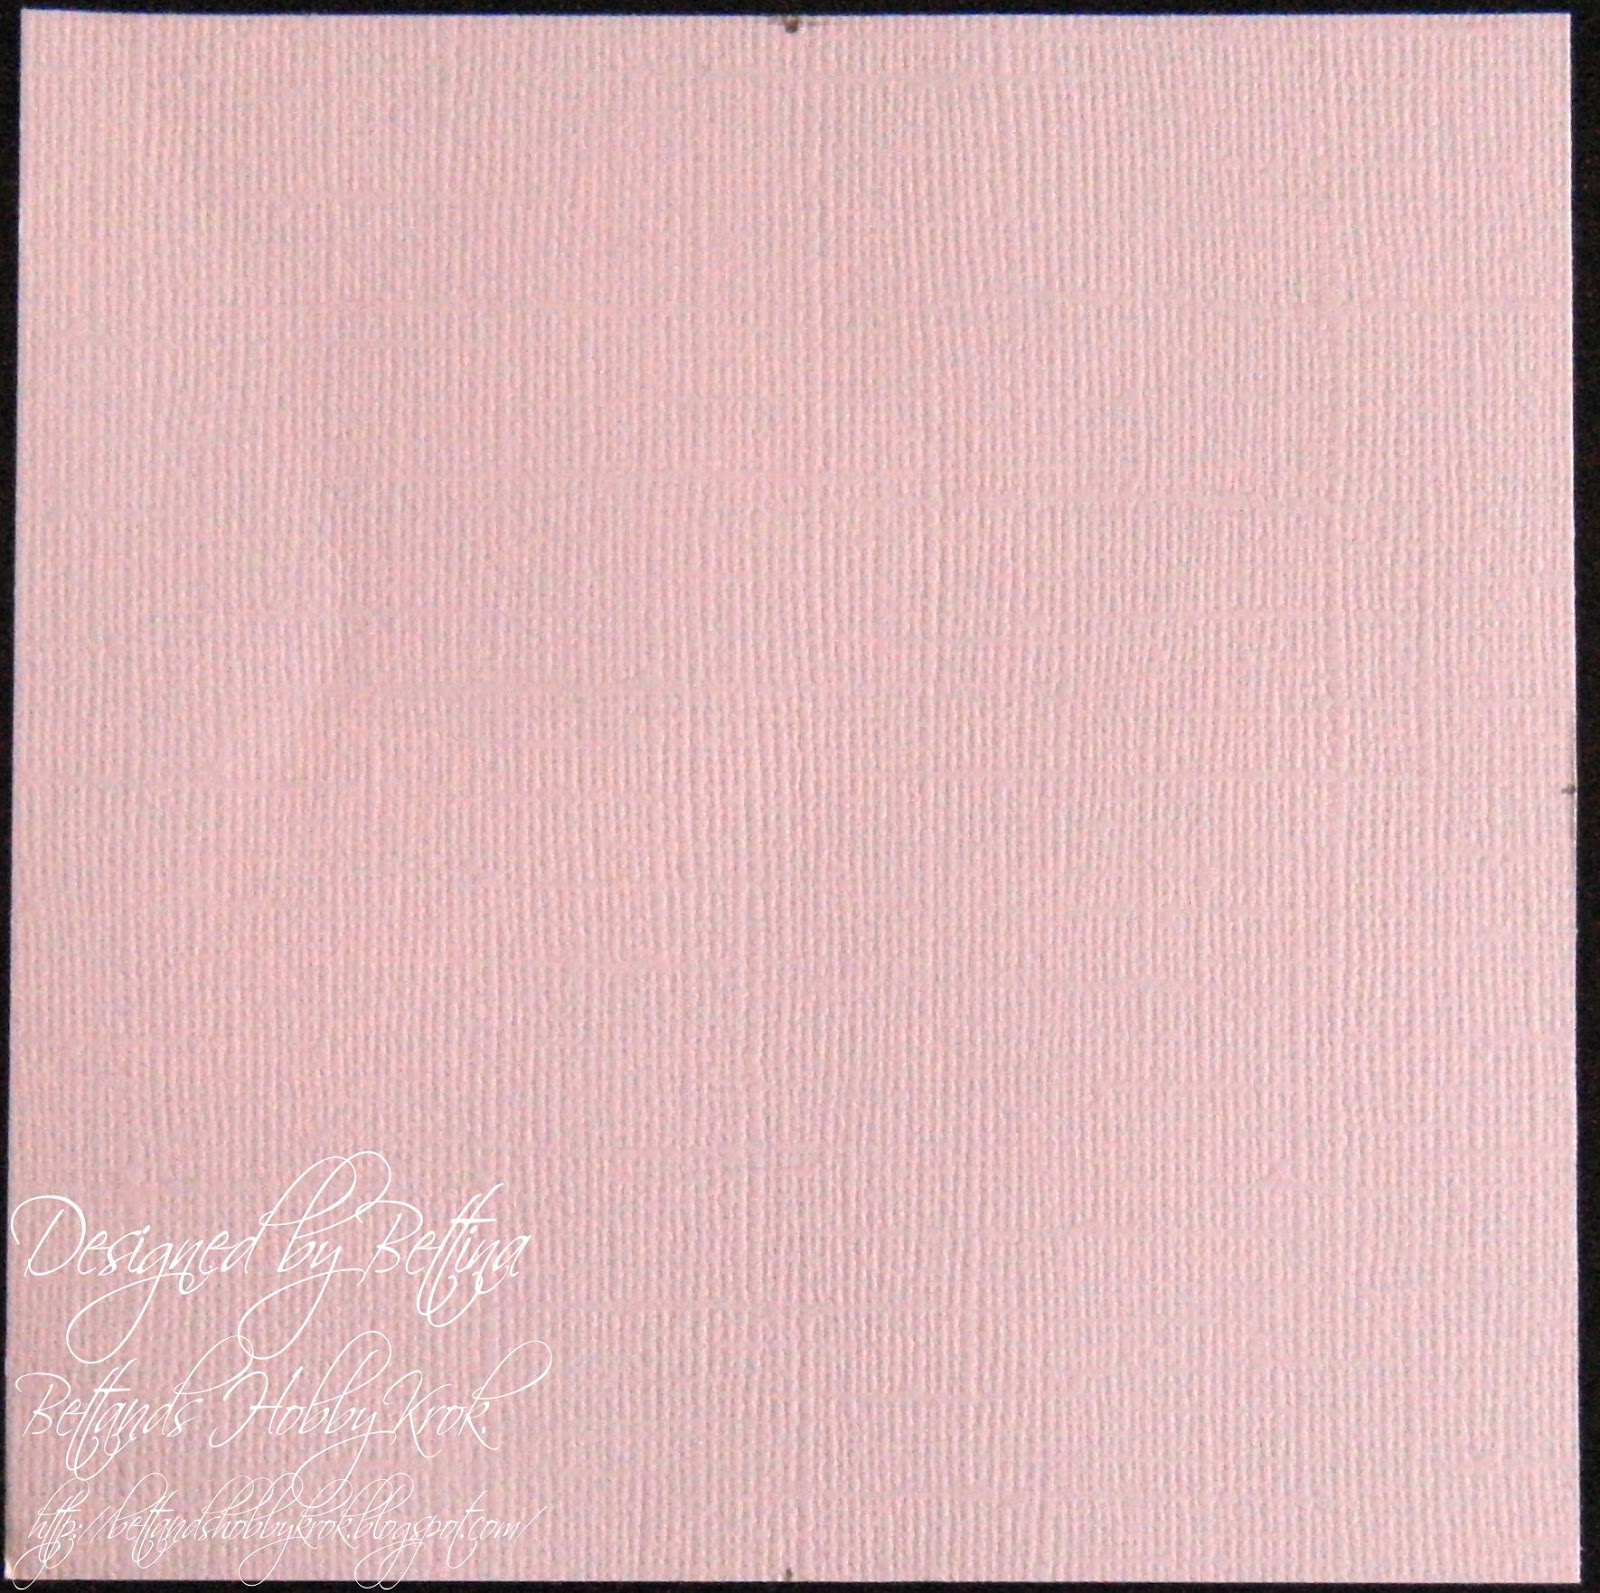
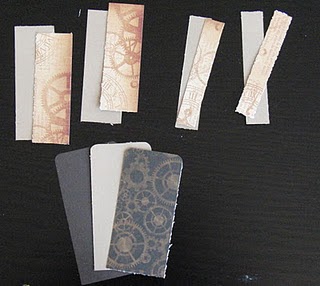
Decorate the box using cardstock and patterned papers. I just decorated the panels that are going to show. Here's my cardstock

Step 6
Then I attached my tag. Make sure it's centered and in lines up with the bottom


Step 7
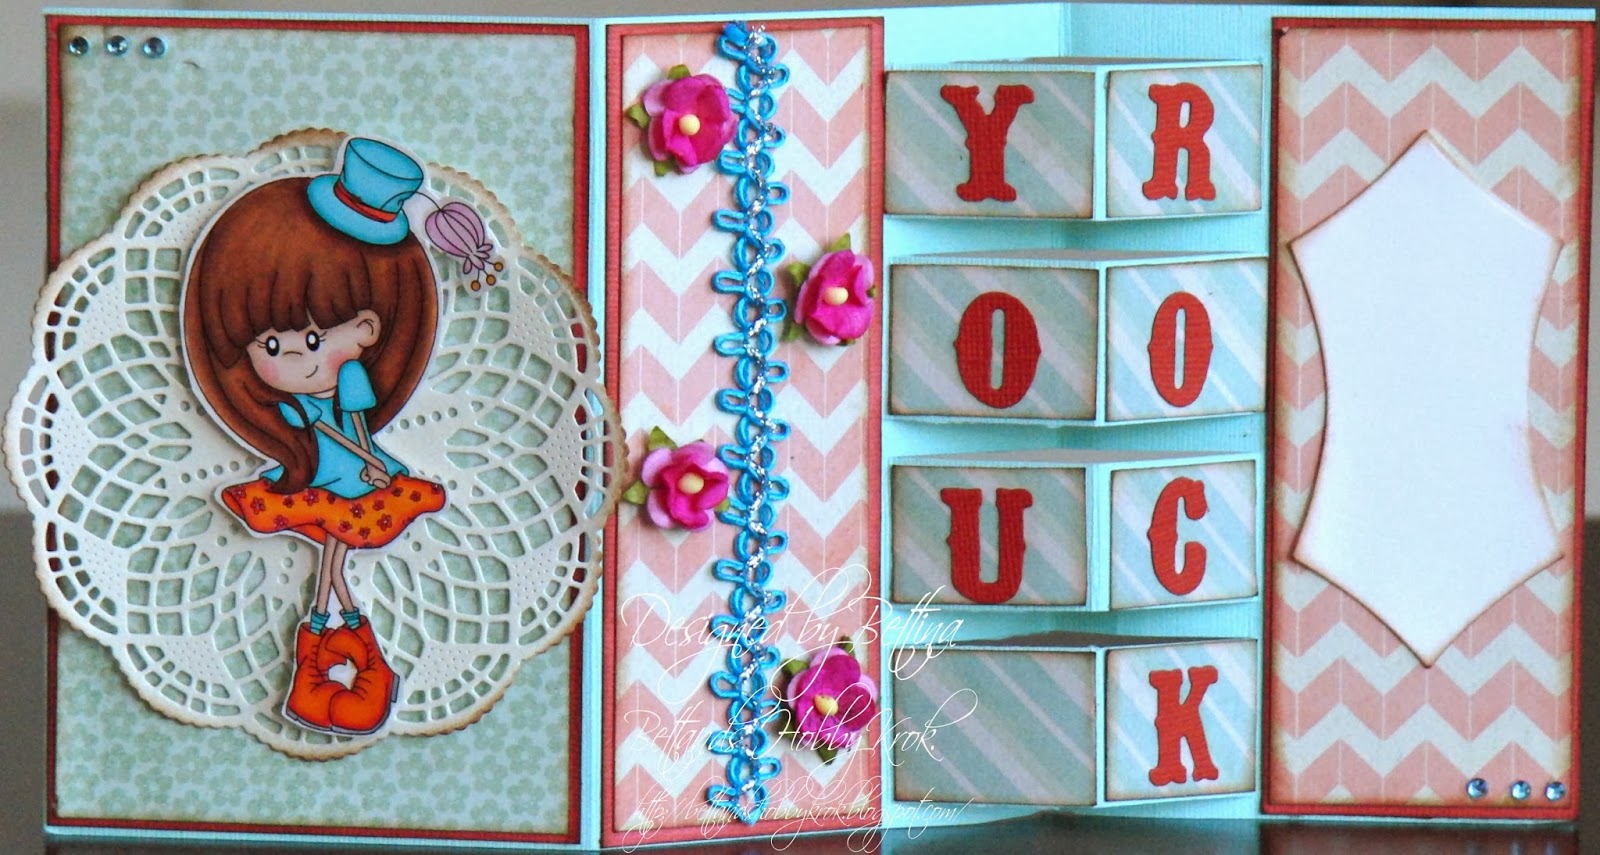
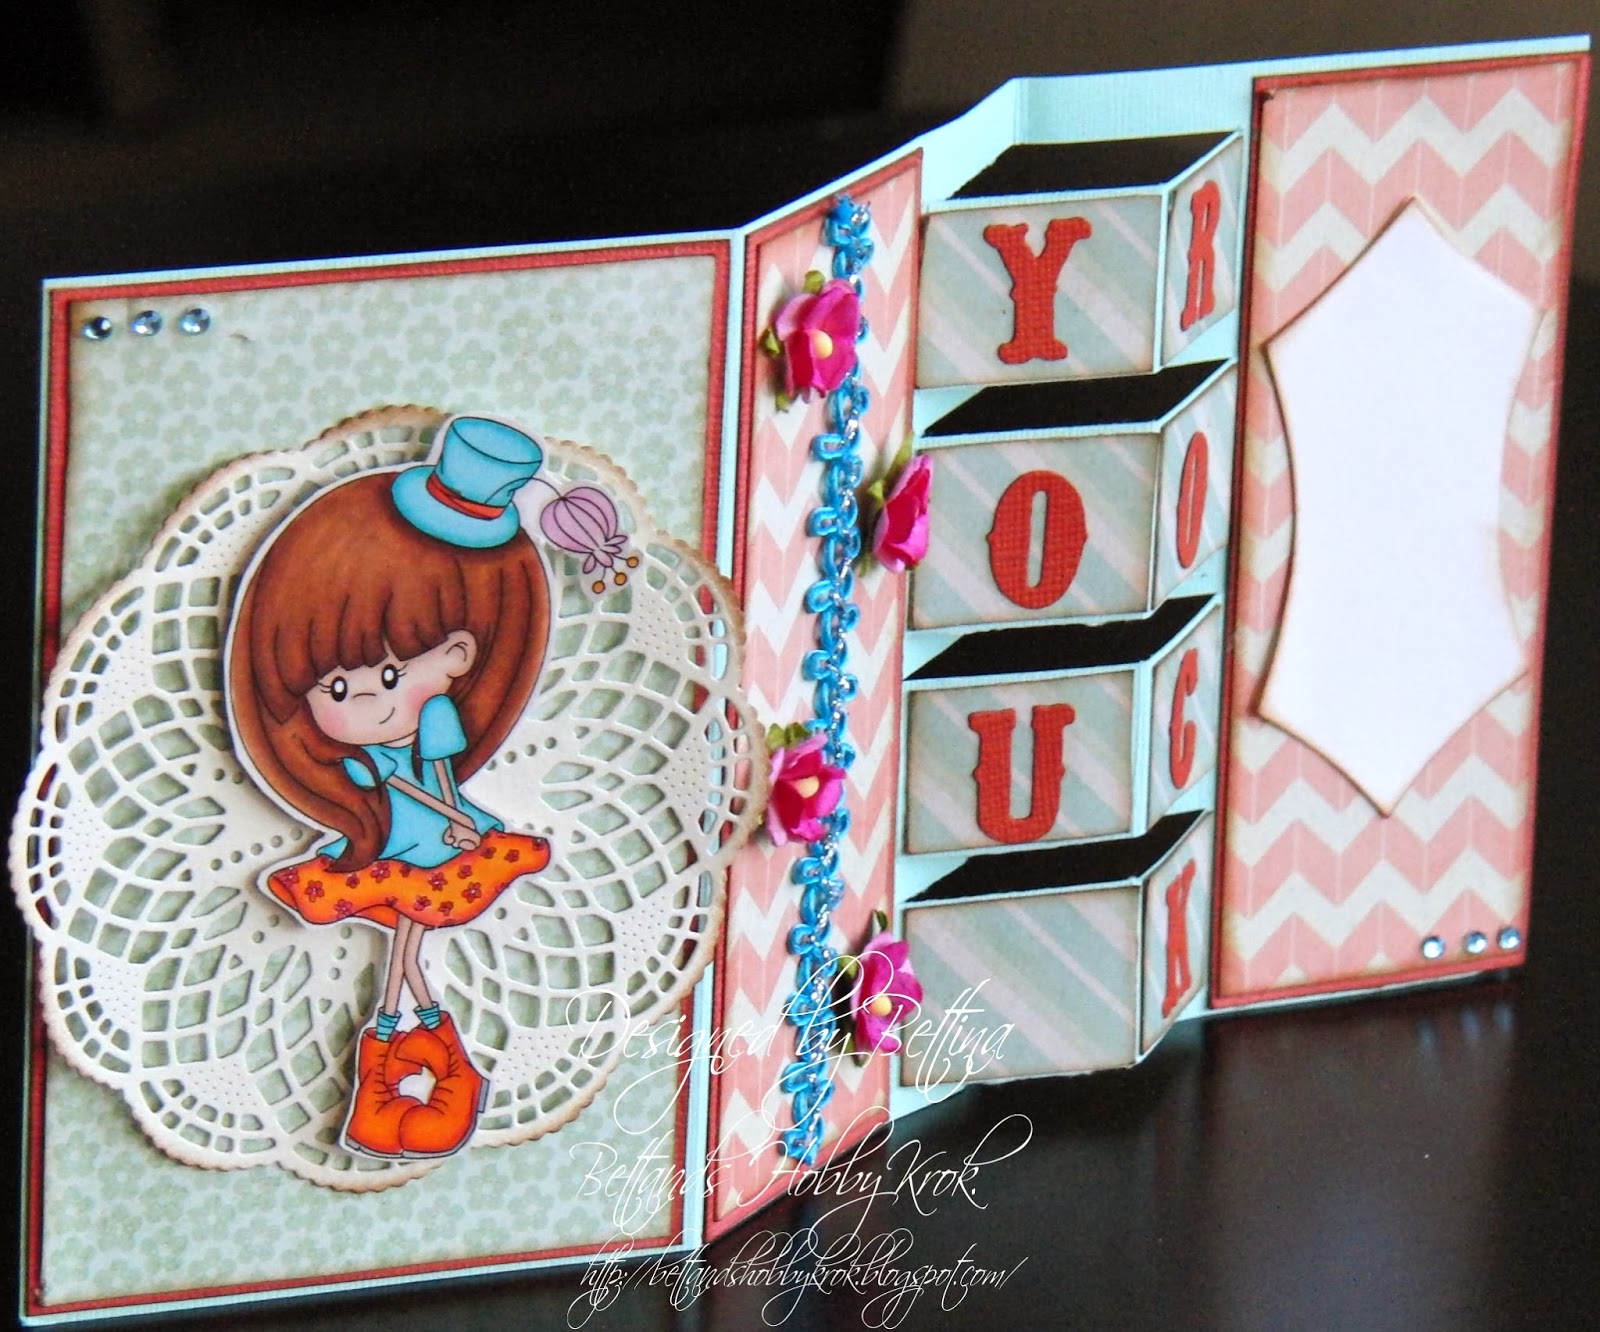
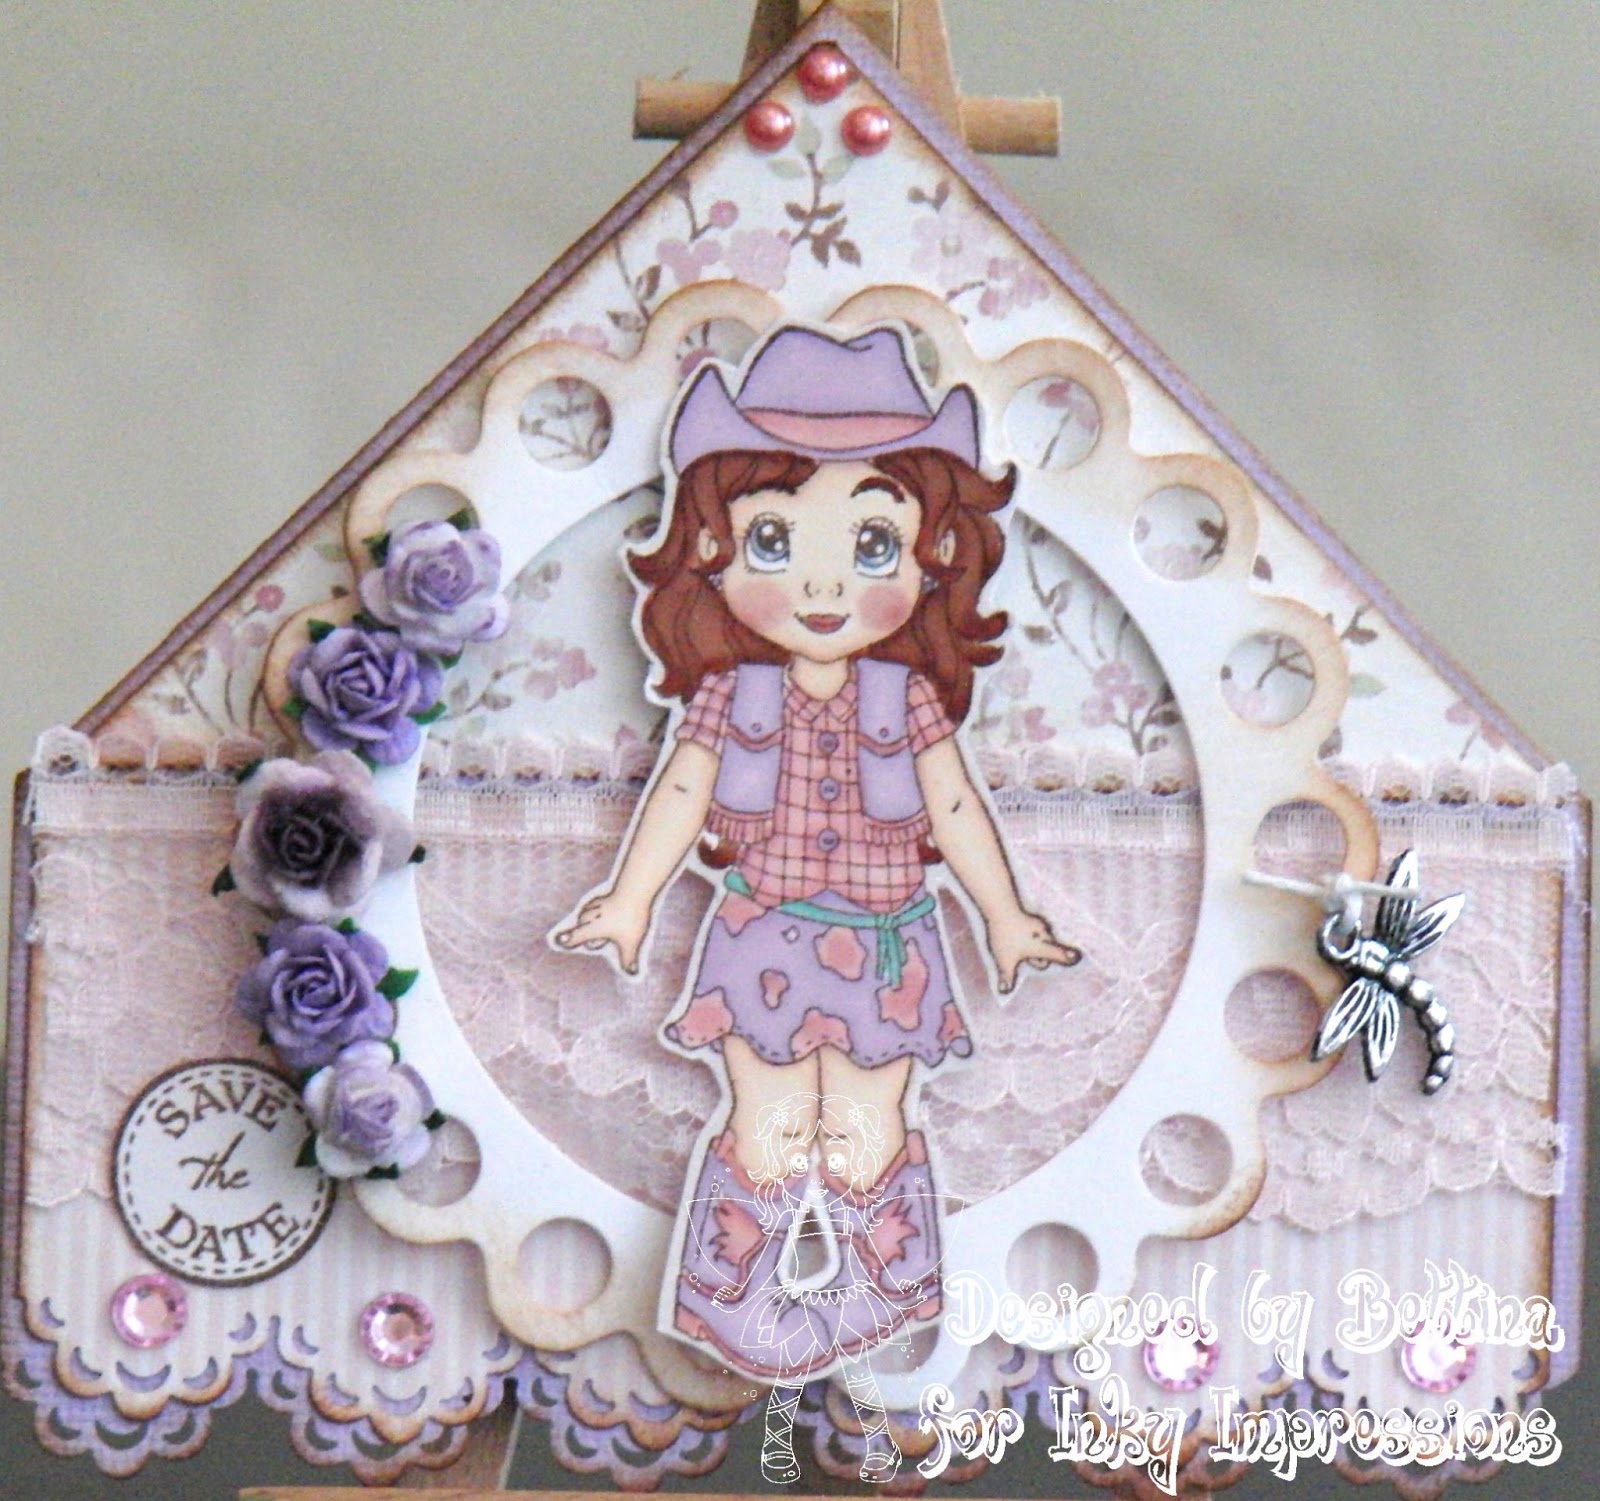
Here it is all finished with embellishments

and here it is closed:


Now it's your turn. Have a go. It's really fun to make this card. I enjoyed every minute of it. Now pop into our challenge blog and join in on the fun and you have to see all the beautiful projects my teammates have made to get you inspired;)

My recipe:
Various brown/ kraft  bazill
DP from Graphic 45 Steampunk debutante collection
Ribbon unknown
Halfpearls from Kort & Godt
Vintage trunkets from Prima
Sprochet gears from TH
All edges are distressed with antique linen distress ink

I've been so lucky to get to use Steampunk Sally from our sponsor Stitchy Bear Stamps. She's coloured with these promarkers: dusky pink, ivory, slate, amethyst, bluebell, umber, warm grey 5,3 and cool grey 1.

I'll deliver my card for these challenges:
Cupcake Craft: Buttons and bows
Make it monday: Anything goes
Sentimental Sundays: Fancy Folds
Art Impressions: Make a tag or a bookmark
Freshly brewed: Fancy Folds
The sisterhood of crafters: Birthday celebrations
I brake for challenges: Girl Power